
For someone just starting in the mortgage industry, creating a new loan in Encompass LOS is like walking into an airplane cockpit. The screens look busy, there are many fields that need to be completed, and every button is important. Within the mortgage industry, the engine that drives everything is the Loan Origination System (LOS). Encompass is the most popular loan origination software in America, servicing numerous lenders/banks/credit unions/independent mortgage companies.
The setup of a brand-new loan file properly in the Encompass system is the most critical skill that new loan officers, processors, or assistants should be able to master. If you do not set the Encompass new loan file up correctly, then it will create many issues down the road, including automated tools breaking; problems with compliance; and, problematic loan file workflows.
Encompass loan file setup for loan officers is a critical first step in the mortgage process, ensuring borrower information, loan details, and required documentation. It’s an easy guide that will help you develop an error-free loan file from the ground up with simple terms that anyone can understand. We can simply name it as Encompass new loan setup tutorial for beginners.
Why Does the Initial Loan Setup Process Matters?
Consider your mortgage file the foundation of your house. A crooked foundation will cause the windows to not function properly down the road. Your loan goes through three simple and critical steps as it moves through the mortgage pipeline:
- The Lead Ingestion Stage
- The File Creation Milestone
- The Underwriting and Closing Stretch
The first stage is where you meet your borrower and input their basic contact information into your marketing software or CRM system. The second stage is the important point where you take your borrower from your marketing system to create an official loan file that exists in Encompass. The last stage is when your underwriter reviews the data, your borrower signs the disclosures, and your loan is approved for closing.
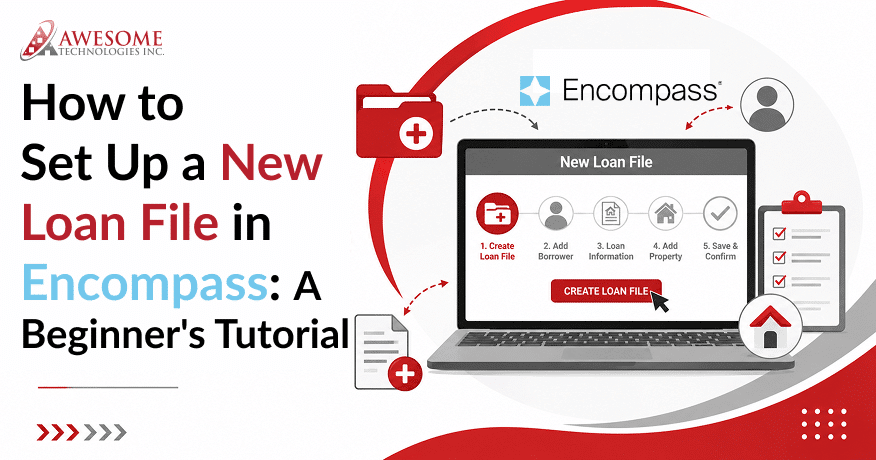
Step-by-Step Guide: Creating Your Encompass Loan File Setup
Encompass for beginners starts with setting up a new loan file, guiding users through borrower information, loan details, disclosures, and document management. Now we will go through some easy steps to create new loan in Encompass LOS:
Step 1: Head Over to the Pipeline View
Open up your Pipeline View. After opening up Encompass and signing in to your account you will want to locate the Pipeline Tab at the top of your Main Dashboard. The Pipeline screen is going to be where all of your active files are going to be, as this is the command center for managing your branch’s loan activity. To add your new file, click on the icon to add a new file (the image of a new piece of paper with a green (plus) + sign next to it)
Step 2: Choose the Right Loan Template Package
When the button is clicked, a small window will drop down, presenting several options for either a blank file or an available template layout. If your client wants to purchase a home, select the Conventional Purchase template from your branch’s standard templates. If the goal is to lower their payment, pick the Refinance template. Choosing a template will automatically load your branch’s unique setup rules, specific state’s compliance disclosures, and default loan officer information so you do not need to key them in manually.
Step 3: Enter Your Borrower’s Personal Details
Ensure that you enter the borrower identification information in accordance with your organization’s security and compliance policies. Make sure you have double-checked the spelling with respect to their identification cards. You could hold up the entire process if the client does not receive their automated secure e-signing packages due to a mistyped email or an erroneous name referenced here.
Step 4: Add the Property Details and Loan Figures
Make sure the client information is correctly inputted into the system. Accurate loan and property data enable Encompass to calculate three important metrics: loan eligibility, payment estimates, and debt-to-income ratio.
Step 5: Run Your Automated Verification Services
Order required third-party services such as credit reports, appraisal/valuation products, income verification, and asset verification. This screen allows you to connect with vendors from outside the Encompass system without having to navigate away. Depending on your lender’s configured service providers, you may be able to order credit reports, valuation products, income verification, and asset verification directly from Encompass.
| Setup Phase | Required Action | Critical Target Field | Ideal Processing Window |
| 1. File Initiation | Click New File and pick your layout | Branch ID, Loan Officer Profile | Processing times vary based on lender workflows, integrations, and borrower complexity. |
| 2. Identity Entry | Type in borrower personal data | Full Legal Name, SSN, Email | Real-Time Entry |
| 3. Financial Fields | Input gross income and assets | Monthly Income, Bank Balances | Instant Ratio Review |
| 4. Verification | Order credit and home values | Credit Scores, Property Address | Processing times vary based on lender workflows, integrations, and borrower complexity. |
Before Creating a File and After Creating the File
These are critical parts of the real-world Encompass workflow.
Real Insights
The use of intelligent system integrations dramatically speeds up and improves safety during the onboarding of current mortgage teams. The moment you put an interface on a third-party application through an API linked directly to Encompass, the actual data submitted by a customer online populates the entire loan file without needing the processor to enter anything manually.
Many lenders automate loan creation through APIs, MISMO-compliant data exchanges, or CRM-to-Encompass integrations rather than relying solely on manual data entry. As your loan volume grows, manual processes can quickly become a bottleneck. Many lenders address this challenge through workflow automation, CRM integrations, and custom Encompass plugin development.
Streamline Your Mortgage Operations Today
To create a highly productive mortgage business that saves time and increases revenue for your branch, the creation of clean files is merely the first step. If your processing staff are still wasting valuable hours on entering data manually, correcting annoying compliance typos, or dealing with confusing software updates, we can assist you in eliminating these problems.
The Systems Integration experts on our team can optimize your Encompass system, link your CRM program to enable for seamless automatic file creation, and train your processing staff to close your loans at the highest speed. It is a fact that robust and data-driven Encompass training helps loan officers master loan file setup
If you would like assistance in creating a more efficient process for your team, simply schedule an easy-going strategy call with our Encompass experts today. We will provide you with a way to develop a quicker pipeline for your staff members! No more worries about how to set up a new loan file Encompass step by step!
Frequently Asked Questions
1. Why does my automated system sync fail when I try to build a new loan file?
Integration errors usually occur when you have left out an important field of data or when you have improperly formatted an important field of data within your intake software. Failures in the Synchronization processes usually are the result of required fields not properly filled in, invalid mappings of fields, Authentication, or data validation rules already present in the lender’s Encompass account.
2. Can I apply a different template package after the loan file is already open?
Yes, you can manually overlay a totally new template by going to your file settings panel. There is a way to manually install new templates to your account via your file settings panel. Existing fields and records can be overlaid by the new template if your administrator configured it in such a manner.
3. How does Encompass keep my borrower’s private data safe from outsiders?
Encompass uses Role Based Persona permissions to manage the level of access and ability to view or change the sensitive information contained within a borrower’s record. Lenders can set up their system to impose field-based security controls, user access controls, and workflow controls based on their job function. Encompass also maintains detailed Audit logs that record the changes recorded on Loan Files to assist agencies with compliance audits and internal reviews of their operations. Depending on the lender, other Security measures such as Encrypting the information in their records or Multi-Factor Authentication may be installed according to their configuration and policies.
4. What is the first step to set up a loan in Encompass?
The first step is to create a new loan file from the Pipeline View or New Loan option in Encompass. Then select the appropriate template and enter the borrower’s basic information.
5. What documents do I upload to Encompass eFolder?
Common documents uploaded to the eFolder include:
- Loan application (URLA/1003)
- Borrower identification (driver’s license, passport)
- Income documents (pay stubs, W-2s, tax returns)
- Asset statements (bank statements, investment accounts)
- Credit and authorization forms
- Purchase contract (for purchase loans)
- Appraisal reports
- Insurance documents
- Title and closing documents
- Underwriting conditions and supporting documentation